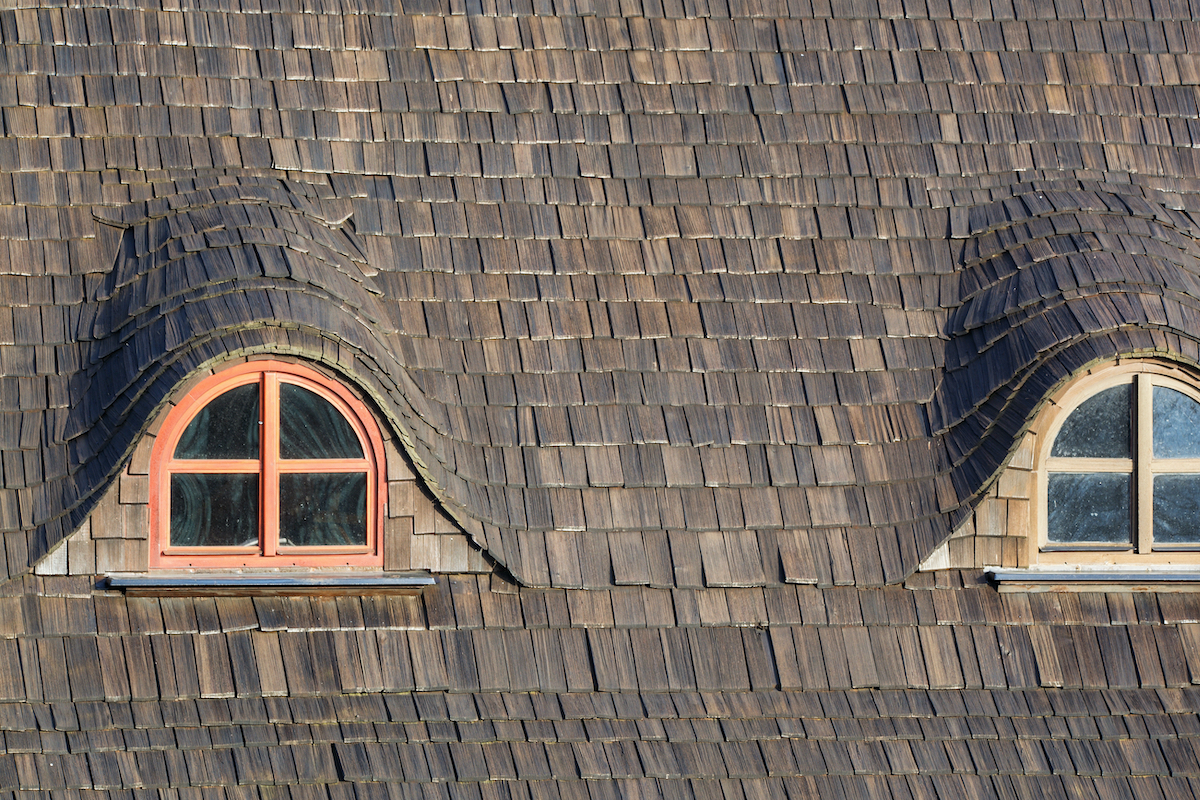
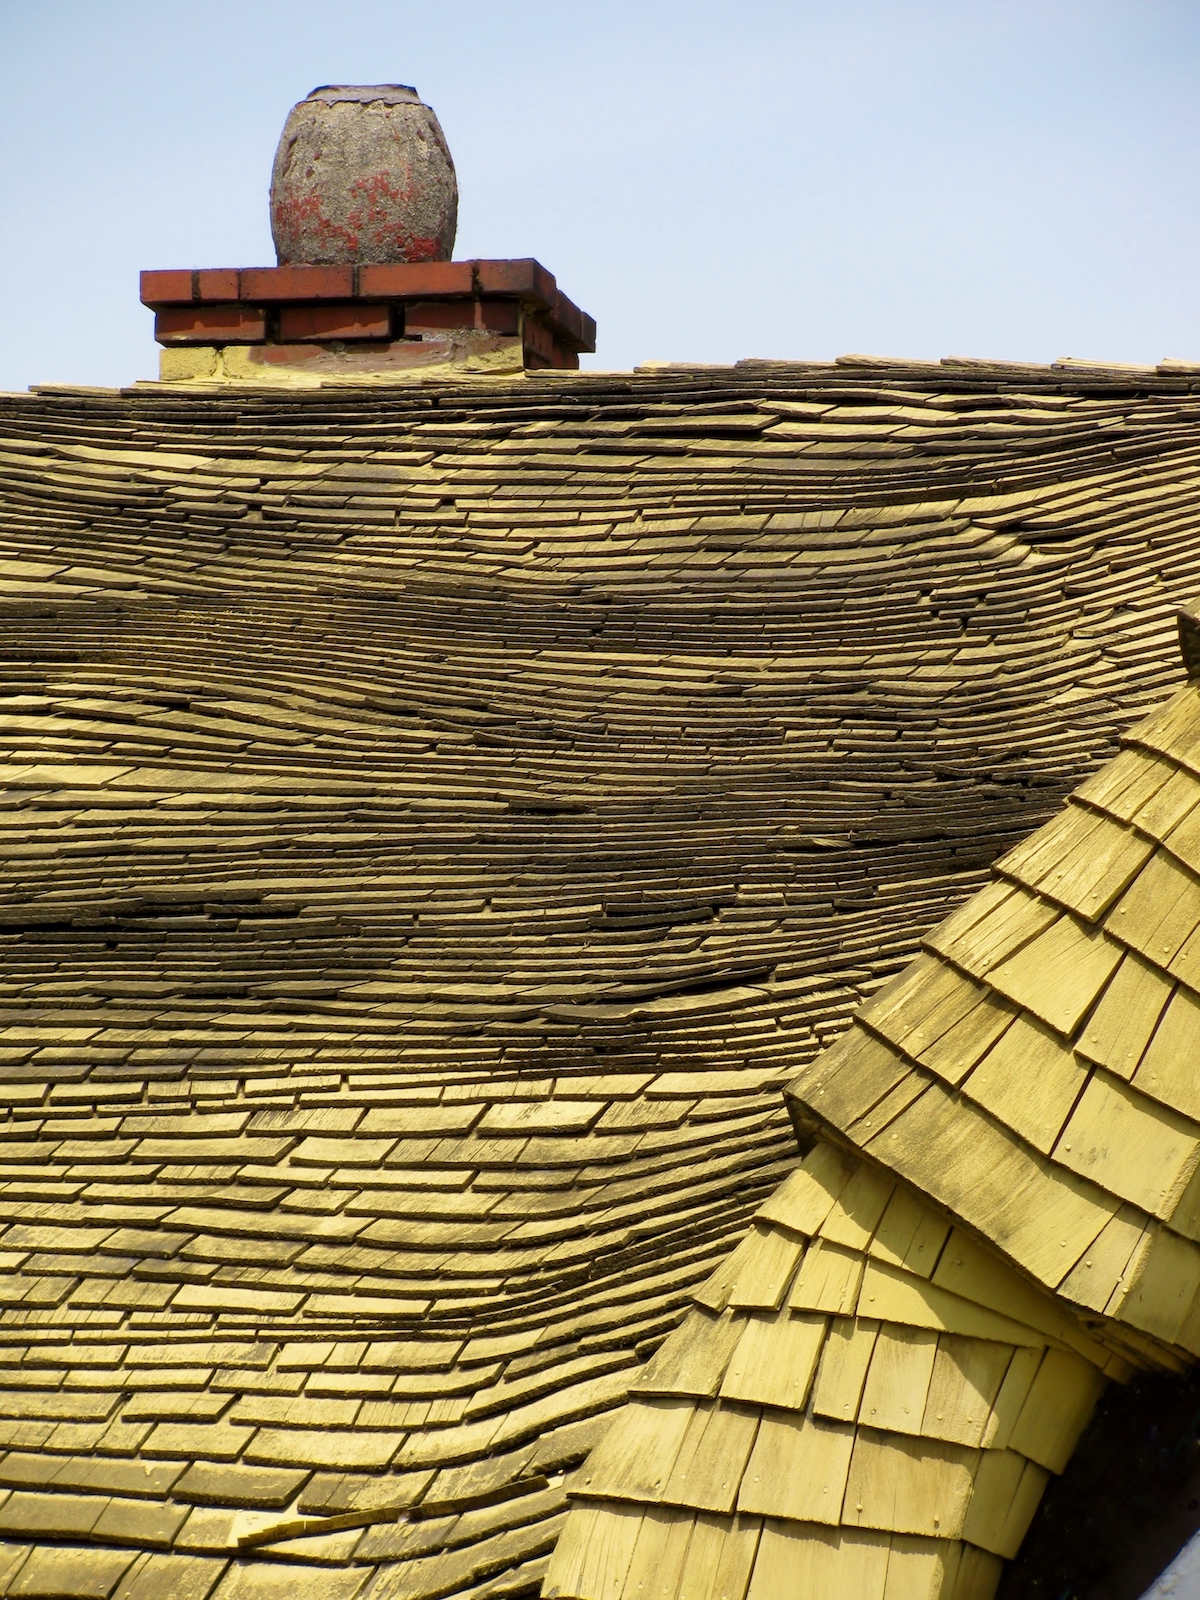
When you install as much cedar roofing as we do here at Connecticut Roofcrafters, you are bound to run into jobs where straight wood shingles must be manipulated to conform to roofs misshaped by age (as in many of our historic restoration projects), rounder roofs found on historic buildings (gothic arch, ships bottom or rainbow roofs, or possessing bell cast eaves), or contemporary homes with more curved lines as part of the design aesthetic.
The process of manipulating shingles is called “Steam Bending”, or “Steam Curled” shingles. It’s a process as old as wooden roof shingles and dates back to the 1800s. Molding shingles allow roofs to be shaped in non-linear patterns that mimic more natural or organic structures, adding a flourish at the top or bottom of more standard roofs to provide them with a nicer aesthetic. What’s more, having curved shingles at the lower or outer edges of a roof may eliminate the need for gutters as rainwater will flow off the roof in a predictable manner.
If you are considering incorporating this time-honored roofing craft into your new or replacement wood roof, here are a few things to consider. We can help with any or all of these steps.
Envisioning your Steam Bent or Steam Curled Cedar Shingle Roof
Any roof shape or style you visualize can be accomplished through the time-tested steam bending process. You can use imaginative homes found in fairytales, such as castles, cottages, or chateaus as inspiration during your planning process. An experienced roofing contractor can help you identify the best curve placement, shingle pattern, and finishing touches to complete your dream home.
Have your roofer sketch out your design to confirm your vision maps to a viable plan. Do not be afraid to suggest changes, as an accomplished contractor experienced in cedar curling can easily create the necessary bends needed to achieve the look you seek. Talk about the stain color and final finish as well to find a tone that compliments your current paint scheme or brick color. Cedar accepts all stain colors, though reddish tones bring out the natural markings of the wood.
Preparing and Bending Cedar Shingles
Once you have decided on a look and the type of materials needed to execute it, it’s time to move on to the fun part – steam bending! This process is especially dramatic during a cold, Connecticut afternoon when the steam resembles a billowing cloud over an NYC subway grate.
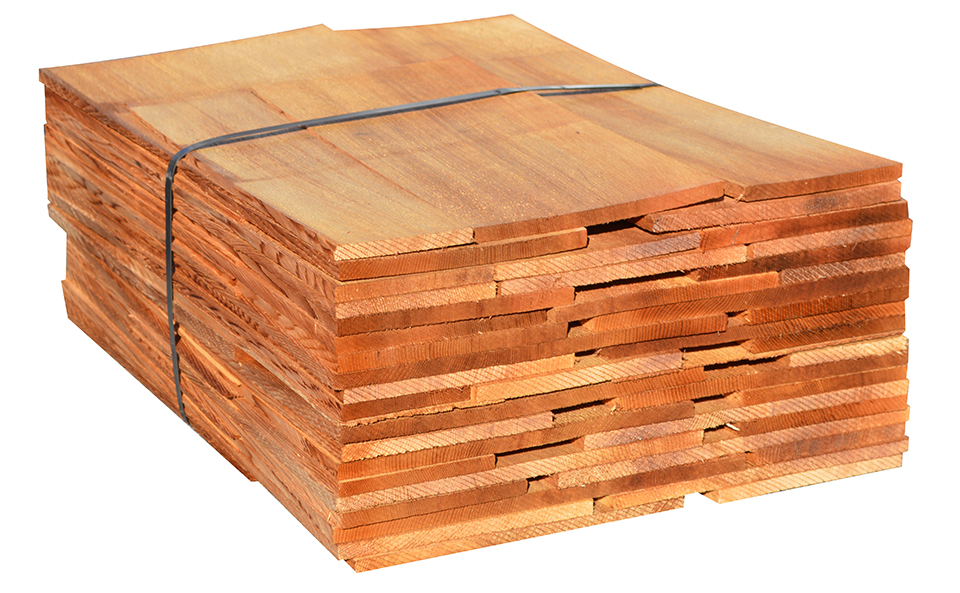
To effectively, efficiently, and properly bend cedar shingles, the highest quality wood is necessary; this isn’t the time to look for the lowest cost. The cedar must be free of all imperfections, such as knots and insect holes, which will prevent a uniform bend during the curling process. We tend to recommend Western Red Cedar perfection shingles from British Columbia for these projects. They are extremely plentiful and feature a nice grain pattern and even orange to red tones.
The next step is to prepare the shingles. If you are going for deeper bends, in some cases, we have soaked the shingles for 24 hours in advance of application so they are more pliable. Then, depending on the radius required for the job, they should be steamed for between 15 to 30 minutes.
And speaking of steaming – now we should discuss the steam box. Here at Connecticut Roofcrafters, we’ve fabricated a custom steam box that can hold 20 – 24 cedar shingles or shakes at a time (depending on grade and thickness). Given that the wood doesn’t soften much until you get above 200 degrees, it’s also important that your steam box is insulated if you will be working in colder environments such as we have here in Connecticut.
Once ready for bending, a form is used to achieve the desired bend radius. What we’ve used pretty effectively is an empty five-gallon propane tank. The time you keep the shingle wrapped around the form will dictate the depth of the bend you are able to achieve. This is best achieved as a two-man operation with one man loading the hot shingle straight out of the steam box and the other maneuvering the bending form.
Extra Protection for Steam-bent Shingle Roofs
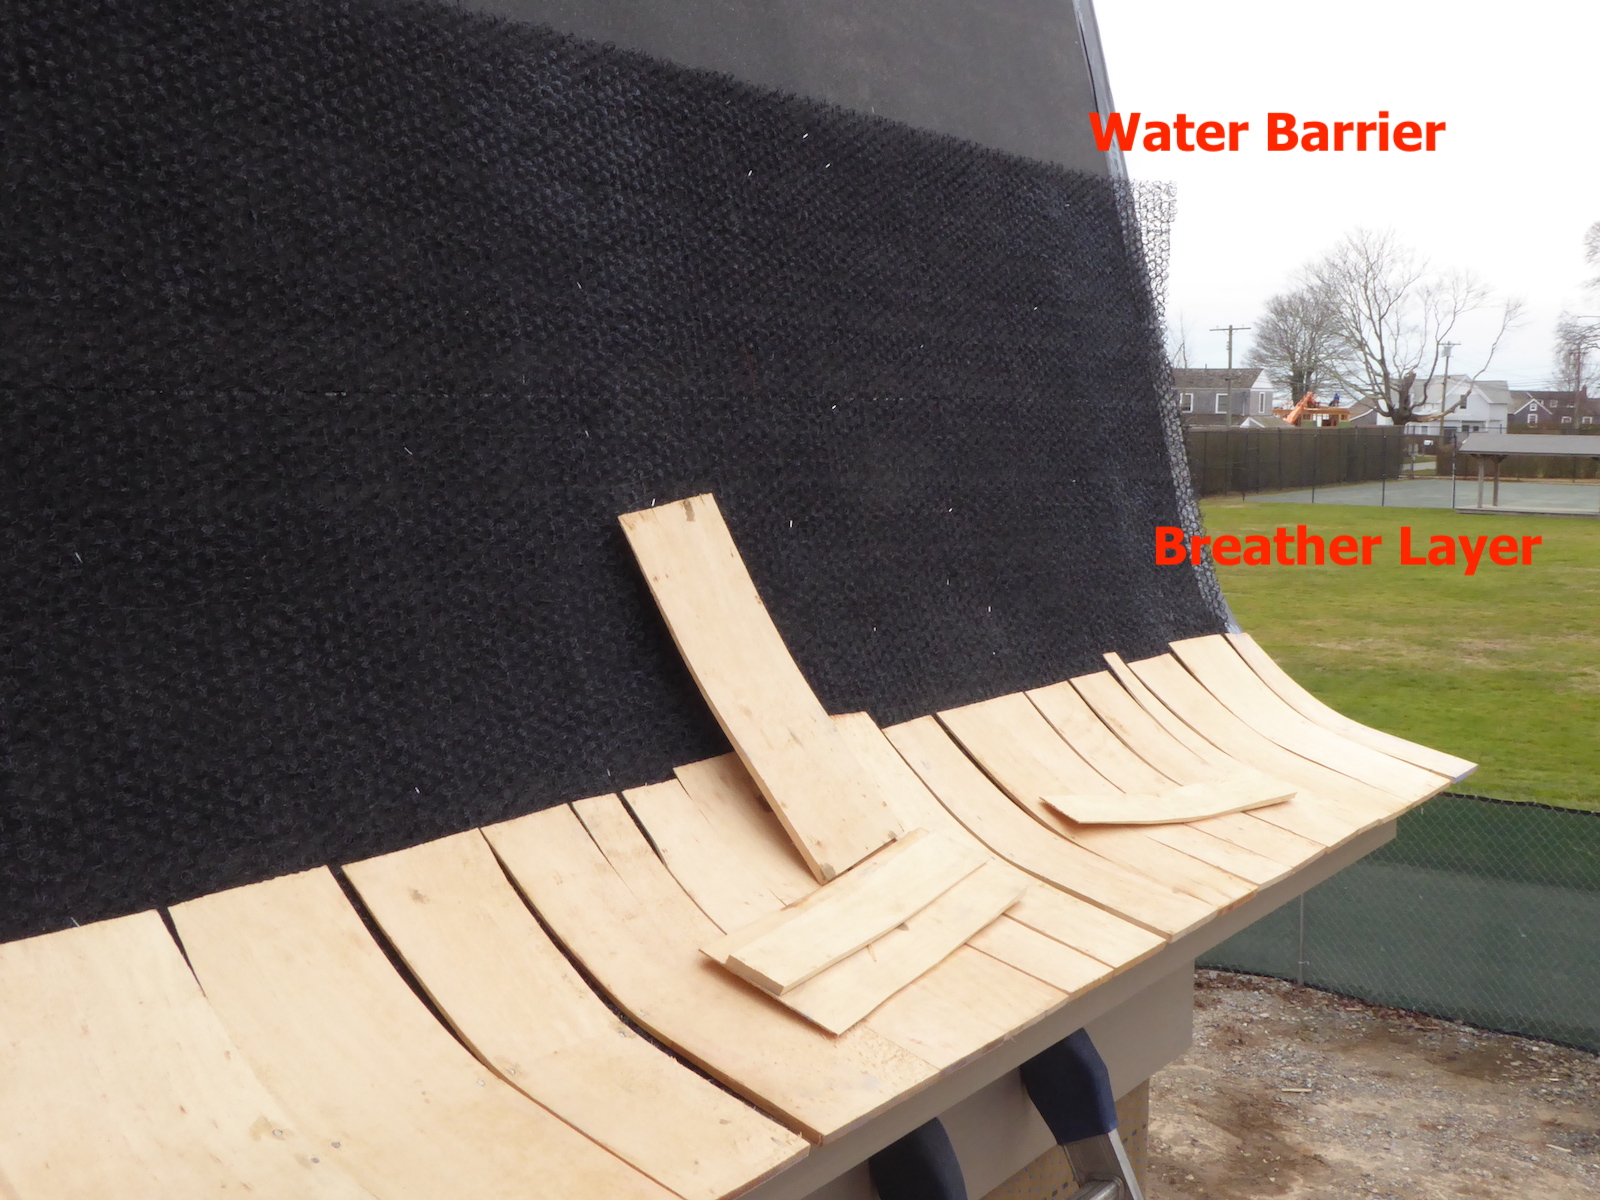
While steam bent cedar shingles will fit tightly together, a vapor barrier should be installed between the shingles and support boards. Vapor barriers protect against any moisture that accumulates beneath the shingles, including condensation on wet, warm days.
Traditional waterproof barriers are created by alternating layers of roofing felt and mastic beneath the shingles; this combination makes the wood materials fully waterproof in any climate. More modern applications mimic this setup but use synthetic materials that are faster and easier to install. The biggest downside is the lack of multiple barriers, such as felt and mastic, which actually protect from perimeter breaches by wildlife and insects. However, if we utilize CCA-treated shingles, this should alleviate this problem. You should weigh the costs of each option to find the one that fits your project budget best.
Bent Cedar in Practice
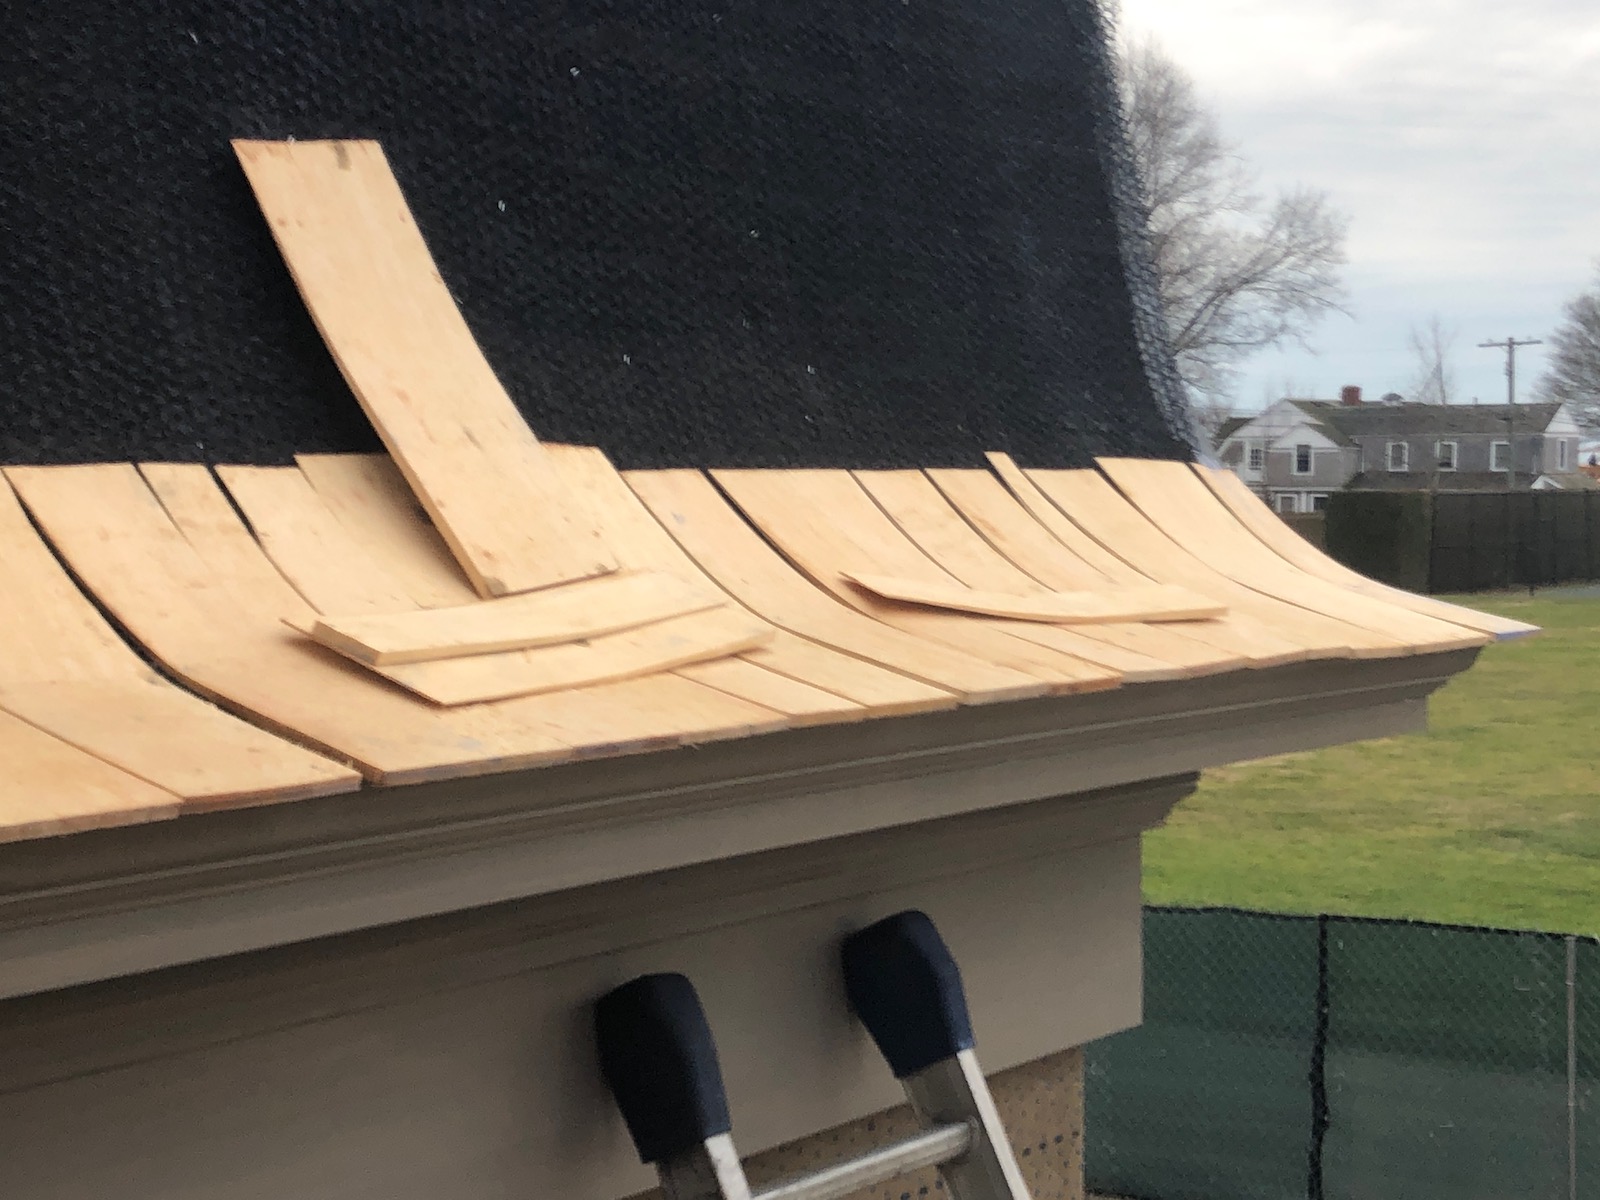
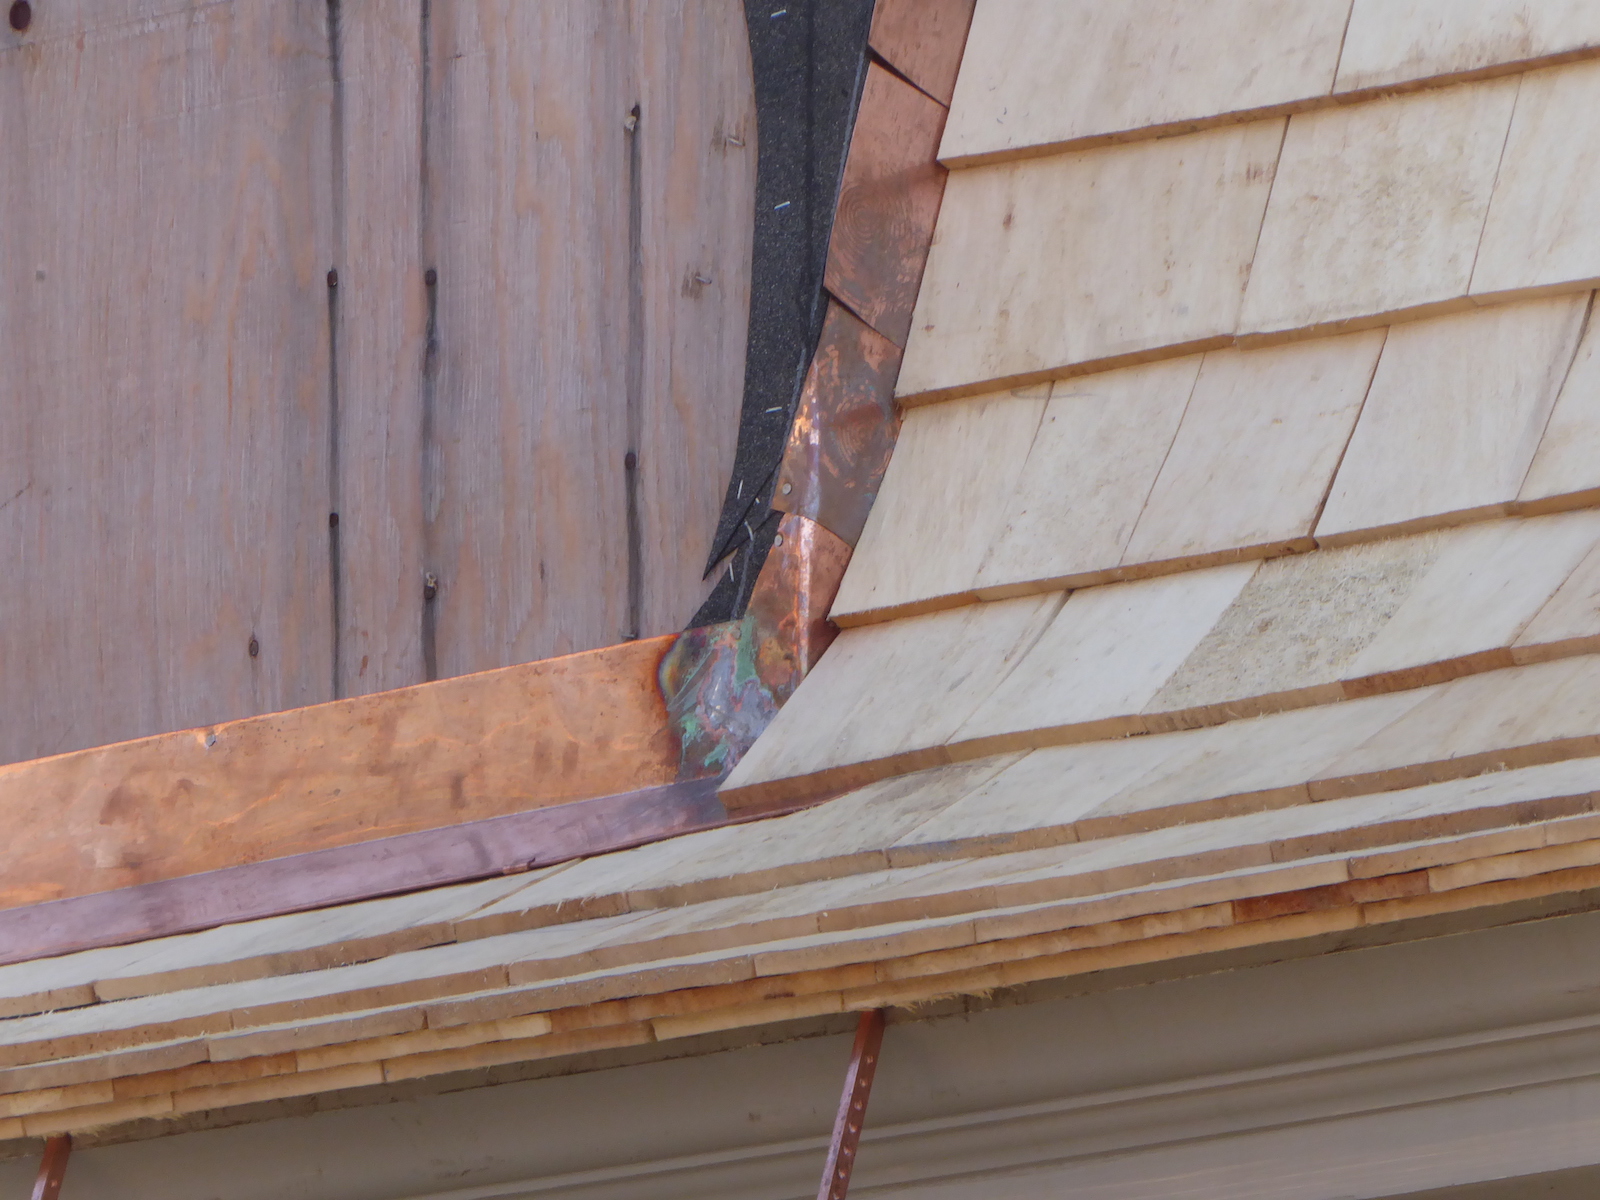
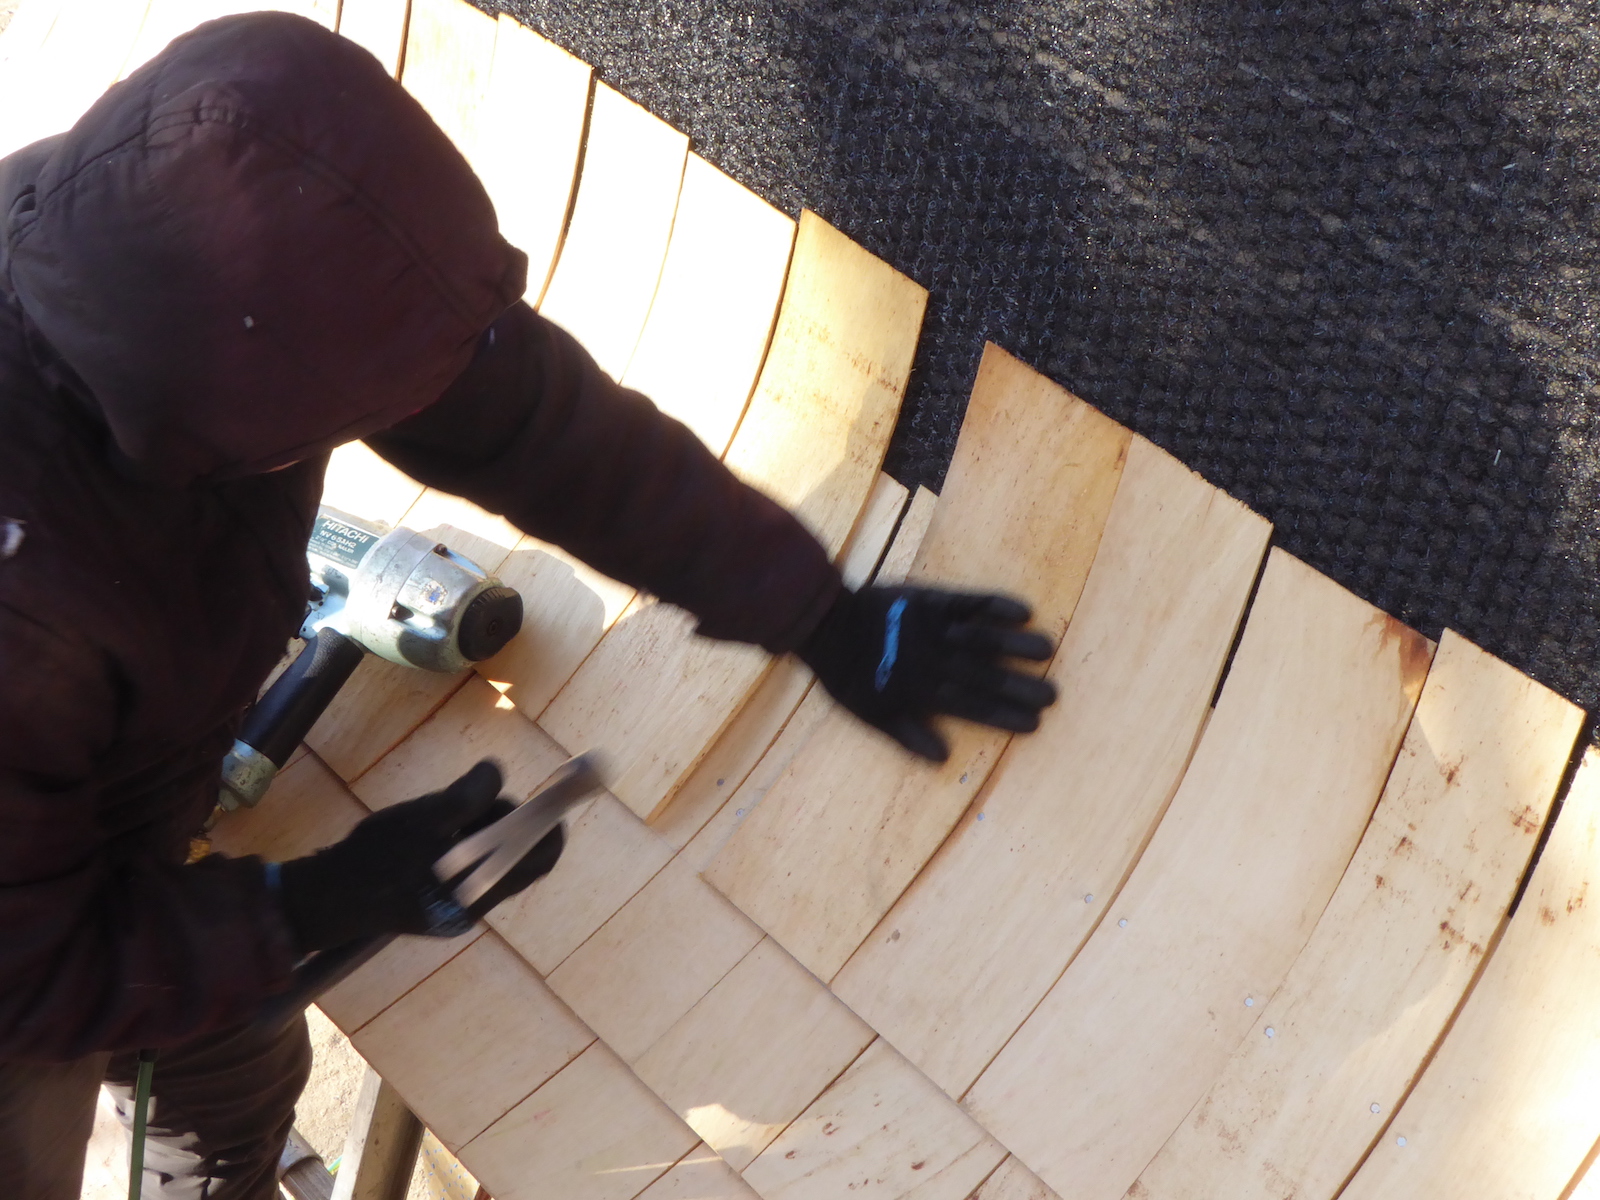
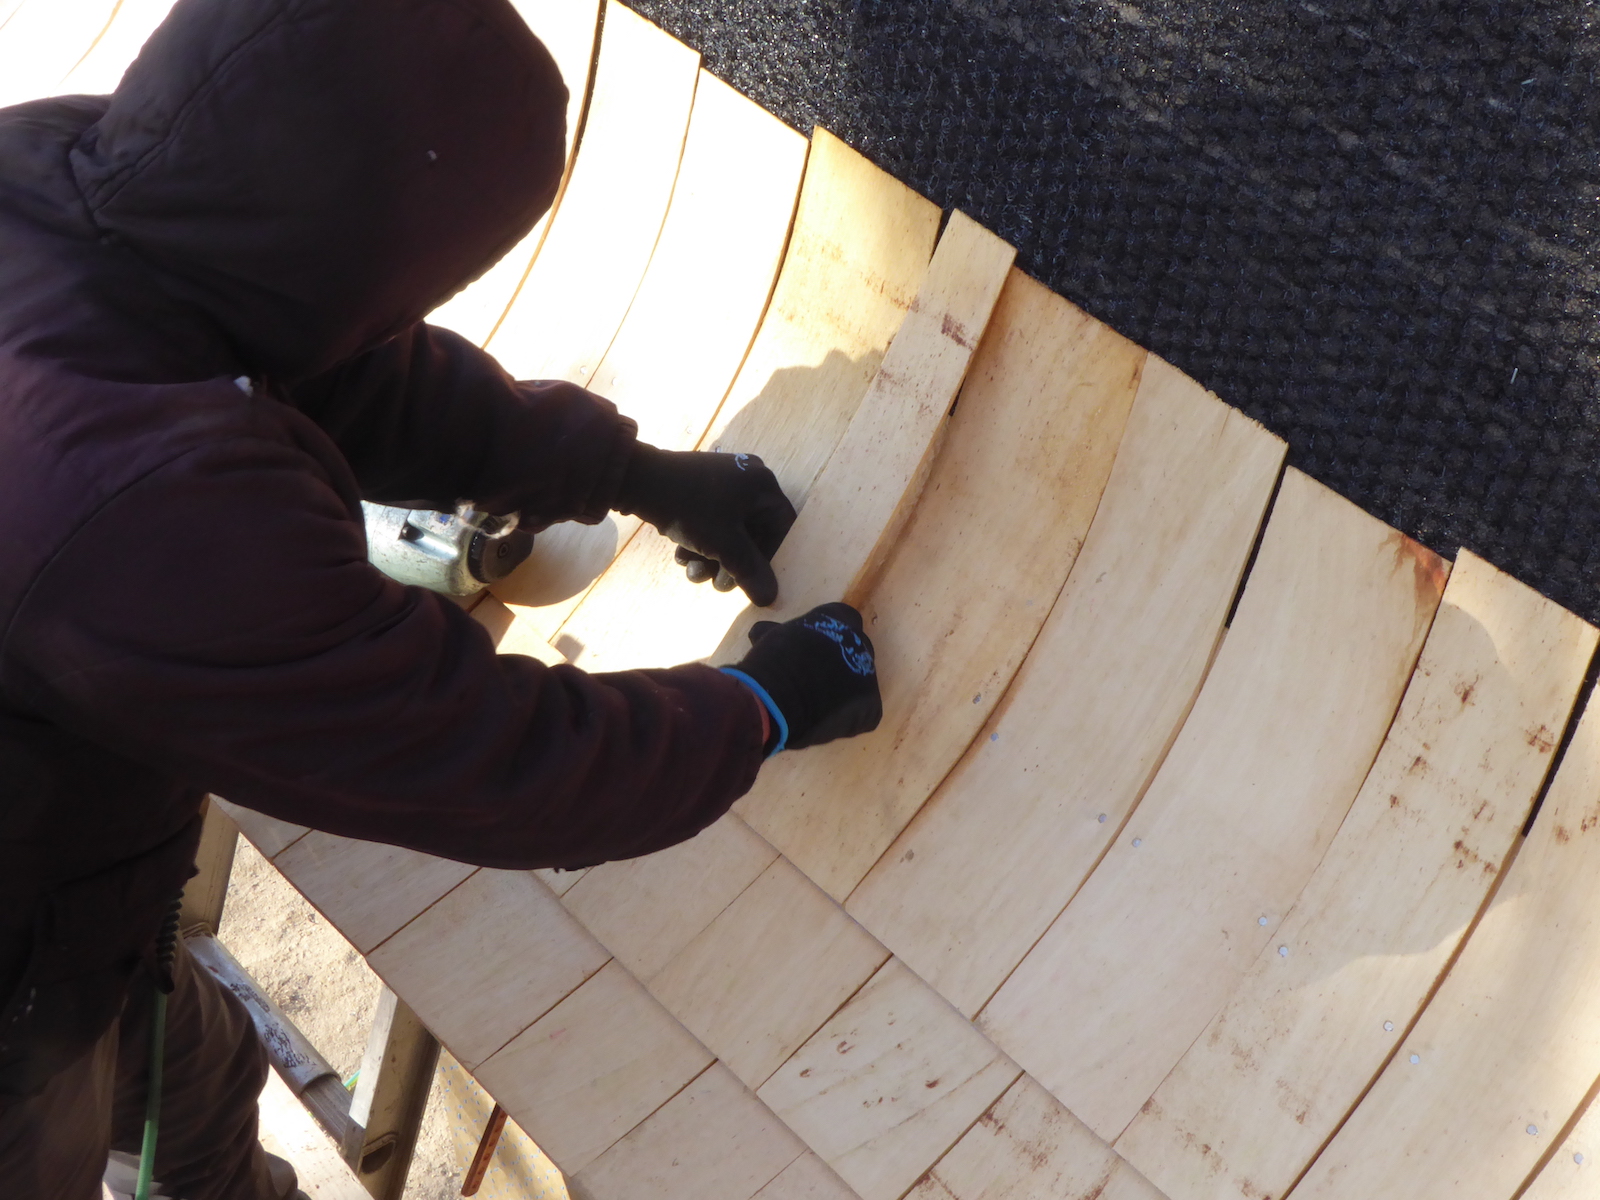
All of the images and the video used in this blog post are from a cedar roof we installed from late 2019 through the early spring of 2020 for new construction on a contemporary beach home in Niantic, Connecticut. The images to the left depict the installation process which involved both machine as well as hand-nailing.
As mentioned earlier, we got to work through the winter on this project and nothing is more dramatic than seeing cedar being steamed on a 20-degree day! In addition to the bent cedar on this project, we also installed custom copper valley flashing for an even more authentic and unique look.
In closing, we truly enjoy the challenge of creating wood roofs that feature steam-bent cedar shingles. If you are interested in discussing your needs in a new, replacement, or repaired wood roof, which might involve bending shingles or shakes, please contact us.